Switching between Main and Second tracks
Switching between tracks is quite easy. Just click on the track in the timeline or use the corresponding button on the Caption bar if the timeline is not visible.
Commands in second track
All commands and options work the very same way for the second subtitle track as they normally would for the main track. For example, if you need to insert new subtitle in the second track you will need to first switch to the second track and then insert the subtitle.
It is important to clarify that all global commands like Format, Recut(Offiset), Check Subtitles, etc. are performed for the selected track by default. Performing the operation for the second or all tracks in the project needs the respective range option to be changed.
Merge tracks, Move subtitles between tracks
If you need to merge the two tracks together you should use the Merge Main and Second subtitle tracks command from File/Multiple Subtitle Tracks menu. It will merge the second track into the main track and remove the second track.
There's also Move subtitle to the other track command which will effectively cut the selected subtitle in the active track and paste it on the other. The command does not have a default keyboard shortcut but you can easily assign one using Customize Keyboard Shortcuts.
Suppose that you have a project where each track contains a translation of the main subtitles and you want to make small changes of the timing or other attributes in all the translations. This is where the Keep all subtitle tracks linked option comes in handy.
Keep all subtitle tracks linked allows you to adjust the timing and appearance of subtitles across all tracks by editing just one subtitle in the active track. Subtitles in other tracks with the same timing will automatically update in the background with the same changes.
Subtitles are not linked by default, but this can easily change by clicking on Keep subtitle tracks linked in the Timeline drop-down menu. Shortcut can easily be assigned to it as well. To select which tracks will be linked go to Timeline/Link Options and choose between Link main and secondary track or Link all tracks.
When activated, the ![]() indicator will be displayed in the upper right corner of the main editor.
indicator will be displayed in the upper right corner of the main editor.
The commands that can be used with this option are:
▪All timecode (timing) commands.
▪Italics, Underline, Color and Font commands when executed for the whole subtitle or whole text line.
▪Box and Outline presentation
▪Alignment and text position commands
▪Insert, Delete, Split and Merge subtitles. Note, that the Split command will create only an empty subtitle, without text, in the other tracks.
▪Cut, Copy and Paste in Preview list.
Preview both tracks in the editor
If there are subtitles that overlap in time, the default behavior is to display the text of these subtitles blended one on top of the other in the main editor. This behavior is expected when working with Japanese subtitles that contain both horizontal and vertical text or when the second track represents forced narrative. But when the second track represents another translation or a slightly different version of the main subtitles, this becomes undesirable.
This can be controlled from the "gearbox" menu on the timeline:
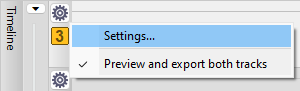
Note that when this option is switched off only the content of the active subtitles track will be exported when using the export commands in Import/Export menu, even the choosen file format supports multiple tracks..