Parameters of audio-, video- and timecode adapters can be adjusted by choosing the Setup… command in the Video menu. Then the following dialog appears:
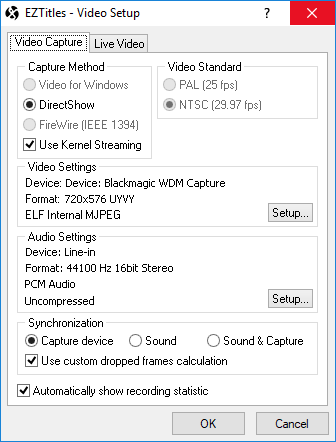
Video Setup – Video Capture
Capture Method
The Video Capture page of this dialog is used to set up the Video and Audio Capture devices and Synchronization method. First you must choose the Video Capture Method:
Video for Windows |
An older video driver standard, not commonly used by modern capture card manufacturers. Available for Windows XP only. |
DirectShow |
Video standard part of the Microsoft DirectX interface. Supported by most Video Capture cards. |
IEEE 1394 (iLink, FireWire) |
Digital Video interface (DV), also known as iLink on Mac machines. Used for connecting Digital Video devices such as digital cameras. |
Video Settings
Once you have chosen the Capture Method, you must adjust the Video and Audio Settings. First click on the Setup button located in the lower right corner of the Video Settings box. The following dialog box appears:
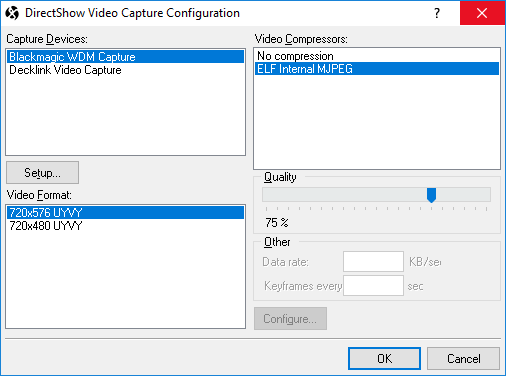
Video Capture Configuration
Capture Device |
Here you must choose your VFW or DirectShow capture device, depending on what Capture Method you’ve chosen earlier. The name of the capture device depends on the hardware manufacturer. |
Video Format |
You must also select the video format and color settings you wish to use with your current capture device. They depend on your capture device capabilities. For the normal functioning of EZTitles you would need half PAL – 352x288 or NTSC - 320x240. Mind that you will need 25 fps for PAL/SECAM and 30 (29,97) fps for NTSC. Note that it is recommended to choose YUY2 format if available. |
Video Compression |
Within EZTitles, "ELF internal MJPEG" is the only compression format available. |
Compression Quality |
You can choose the degree of video compression when capturing video material. Lower values mean smaller AVI size but at the price of poor quality. Greater values mean larger AVI size and better quality. |
Video for Windows
If you have chosen the VFW Capture Method, click on the Setup button under the Capture Devices listbox. The following dialog box appears:
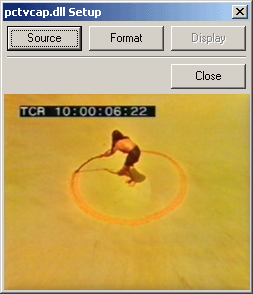
Video for Windows Capture Setup
The dialogs, which appear after clicking on the Source, Format and Display buttons are provided by the Video for Windows capture driver, so they will not be discussed here.
The only thing to be said is that the Source button provides selection of the video input (S-VHS, Composite, TV Tuner) and the video standard (PAL, NTSC), and the Display button is for changing the picture properties.
please mind that Video for Windows method is not available on Windows Vista or later.
DirectShow
If you have already chosen the DirectShow Capture Method and pressed the Setup button, another dialog will pop up containing settings to adjust the video capture's device settings, like for example:
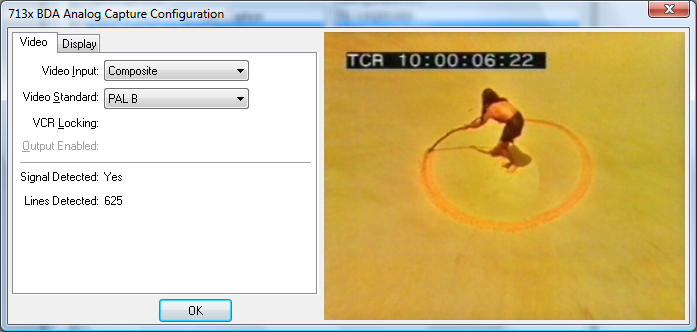
DirectShow Capture Configuration – Video Page
Here you can select the Video Input and the Video Standard, that will be used, and whether the VCR will be locked or not (if the capture driver supports it).
The Display settings (shown below) enable you to fine-tune the picture properties (Brightness, Contrast, Hue, Saturation, Sharpness and others).
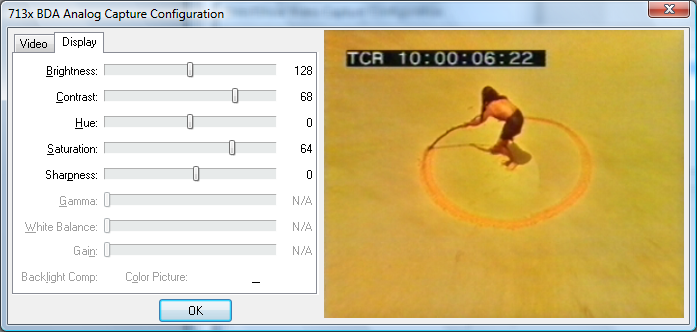
DirectShow Capture Configuration – Display Page
Note: please mind that the ones you see may be different than those given in the above example as they depend completely on the settings and options your video capture device provides.
Audio Settings
Once you have finished with the Video Settings, press the Setup button, located in the lower right corner of the Audio Settings box, so that you can adjust the audio setup. Take a look at the dialog box below:
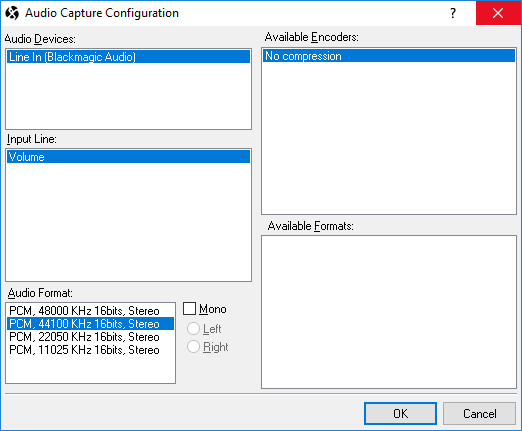
Audio Capture Configuration
Audio Device |
With this field you can select your preferred audio device (sound card). If you have only one sound card, it will be selected automatically. |
Input Line |
You must select which sound input you will use to record audio. |
Audio Format |
Select the audio format for audio capture. Higher values mean better sound quality. please mind that more disk space will be required in that case. |
Mono audio capture |
Some video players are mono and some use the audio channel to transmit LTC. If that is the case with your video player, then you can use this function to select only one channel. |
Note: Please keep in mind that EZTitles does not support audio compression.
Synchronization
The Synchronization method must also be selected if you intend to record video with DirectShow capture method. You can choose from Capture Device, Sound or Sound and Capture synchronization. Synchronization is needed, because sometimes frames are dropped, but you need to keep the timecode accurate.
You can select Capture synchronization if your capture device is reliable and always returns information when a frame is dropped. Sound synchronization is for those, whose capture device never returns information or returns irrelevant information.
And finally when your capture device does not always returns information you might choose Sound and Capture synchronization. If you’re not sure what to choose, select Sound synchronization.